To edit a screenshot on a Mac, click the thumbnail that slides into the corner right after you take it. That opens Markup, where you can crop, draw arrows and add text. Click Done and the edit is saved.
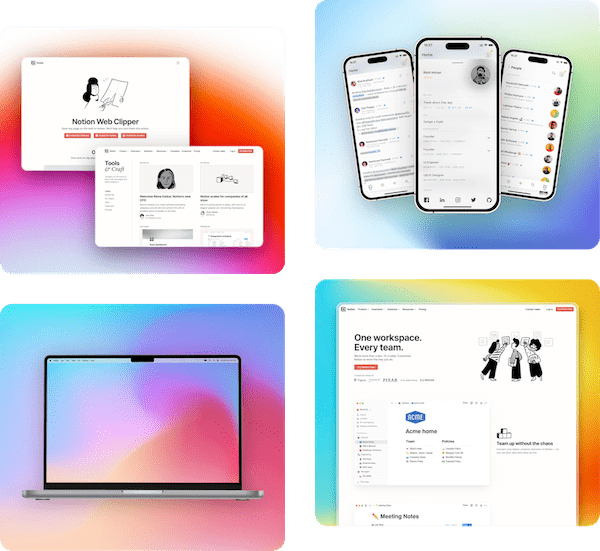
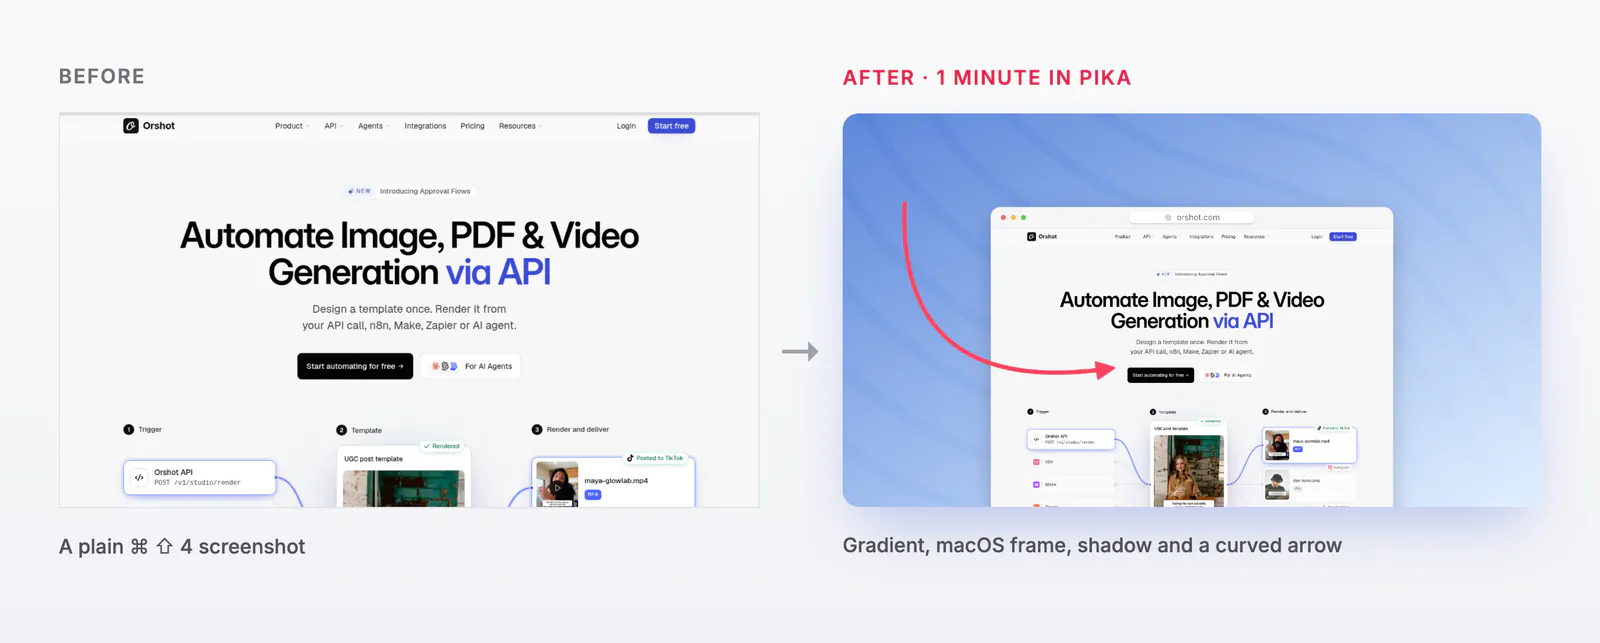
For a screenshot you already saved, double-click the file to edit it in Preview. To put it on a background with a frame and a shadow, like the right side below, you need an editor such as Pika.
What do you want to do?
Pick the row that matches your job. Each one jumps to its part.
| What you want | Use | How |
|---|---|---|
| Crop, add arrows or text | Markup | Click the thumbnail |
| Resize, crop or convert a saved file | Preview | Double-click the file |
| Hide or change text | Markup | Cover it with a filled box |
| Add a background, frame and shadow | Pika | Paste with ⌘ V |
Take the screenshot first
Every macOS screenshot shortcut uses ⌘ Command and ⇧ Shift plus a number. Add ⌃ Control and the screenshot goes to your clipboard instead of a file.
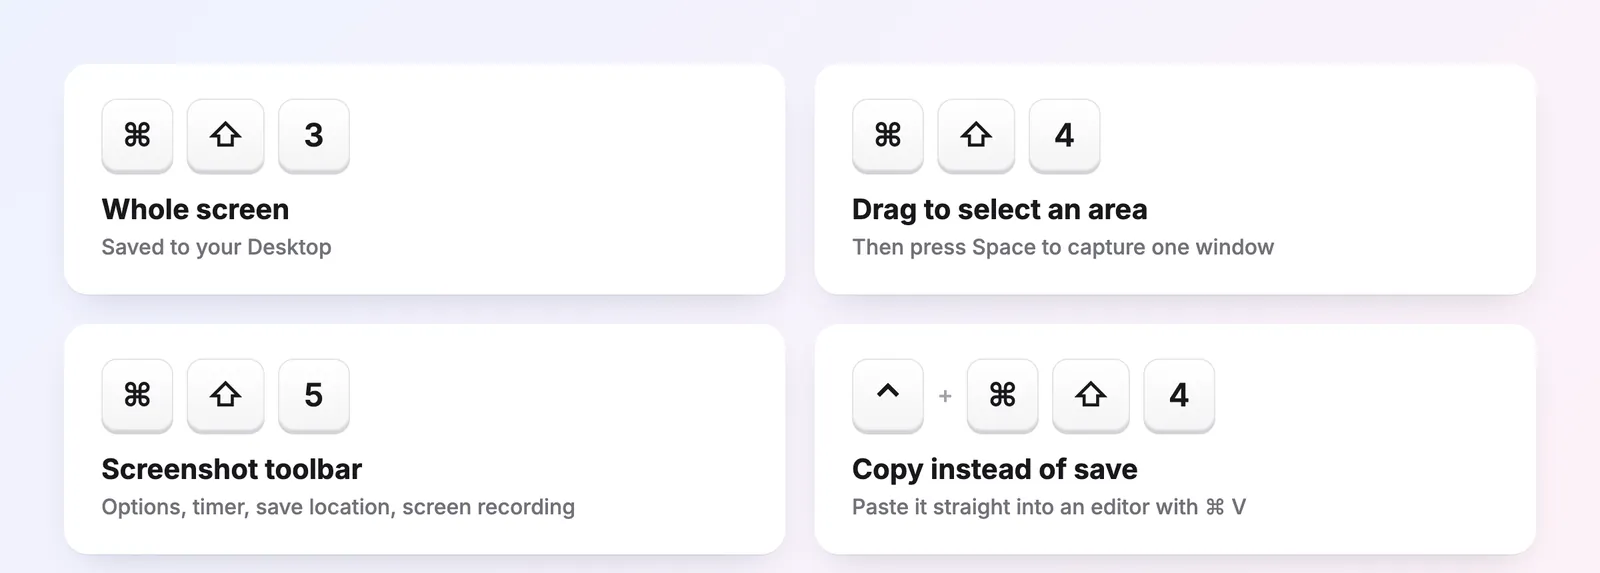
- ⌘ ⇧ 3 captures the whole screen.
- ⌘ ⇧ 4 lets you drag to select an area. Press Space after it to capture one window.
- ⌘ ⇧ 5 opens the screenshot toolbar, with a timer, screen recording and options.
- ⌃ ⌘ ⇧ 4 copies the area instead of saving it. I use this one most, since I paste straight into an editor.
macOS saves screenshots to your Desktop by default. To change the folder, press ⌘ ⇧ 5, click Options and pick one under "Save to". Apple's shortcut guide lists a few more.
1. Crop and annotate a screenshot with Markup
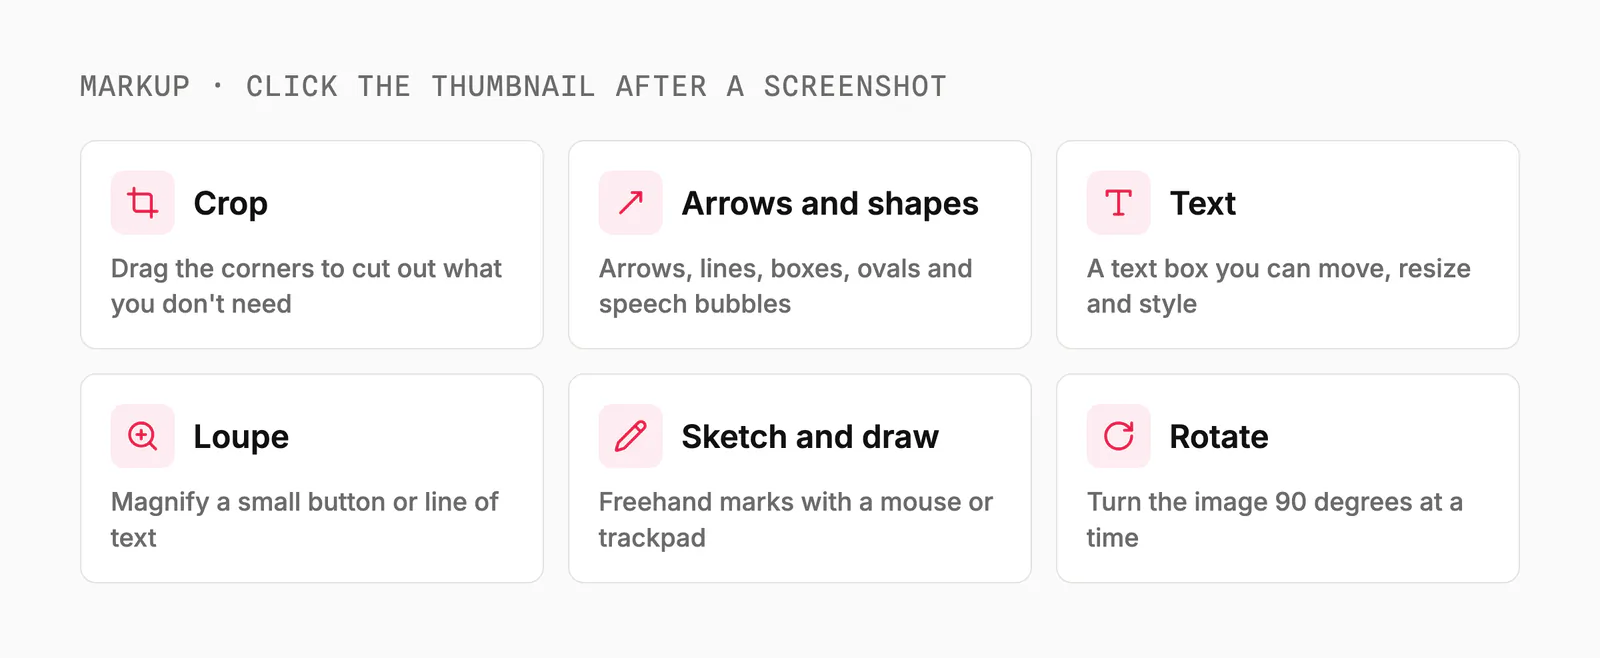
Markup is the editor built into macOS, and it opens when you click the thumbnail after a screenshot. It covers cropping, arrows, text and freehand drawing.
Pick this if you need a quick crop or an arrow on a screenshot you just took.
Step 1: Click the thumbnail
The thumbnail sits in the bottom-right corner for a few seconds. If you miss it, the screenshot is saved as it is and you can edit it in Preview instead.
Step 2: Crop and mark it up
Click the crop button and drag the corners. Then add arrows, boxes or speech bubbles from Shapes, and a text box from Text.
The loupe magnifies one part of the screenshot. It helps when the thing you're pointing at is a tiny button or a line of small text.
Step 3: Click Done
Done saves the screenshot with your edits. ⌘ Z undoes a step before that, and the share button sends the edited image to Messages, Mail or AirDrop.
No thumbnail?
Best for: quick fixes right after a capture, with nothing to install.
2. Edit a saved screenshot in Preview
Preview opens a saved screenshot when you double-click it. Preview has the same Markup tools, plus resizing, colour adjustment and format conversion.
Pick this if the screenshot is already a file, or a site asks for an exact size or format.
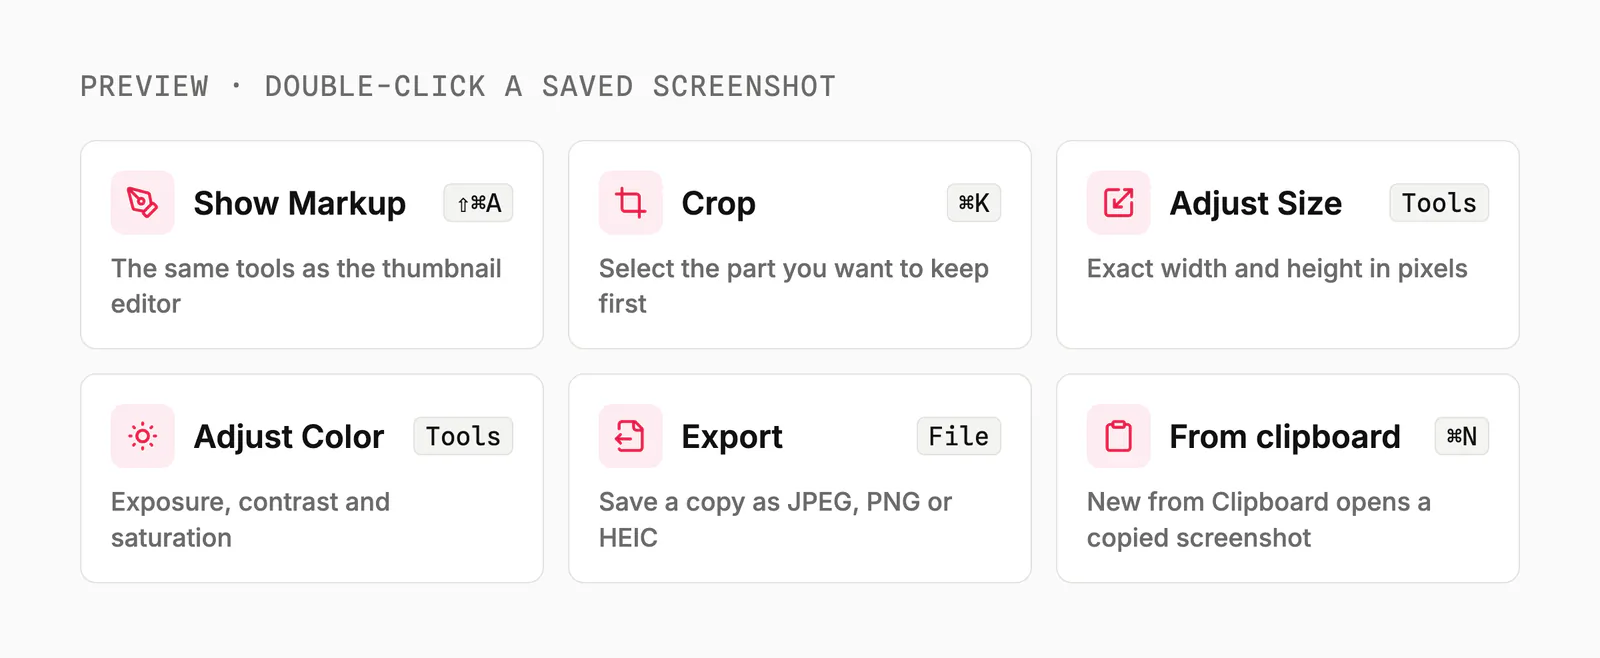
- Markup. Click the pen icon in the toolbar, or press ⇧ ⌘ A.
- Crop. Drag over the part you want to keep, then press ⌘ K.
- Resize. Tools → Adjust Size sets an exact width and height in pixels.
- Fix the colours. Tools → Adjust Color changes exposure, contrast and saturation.
- Rotate or flip. Both are in the Tools menu.
- Change the format. File → Export saves a JPEG, PNG or HEIC copy. A JPEG is usually much smaller than the PNG macOS saves.
Copied a screenshot with ⌃ ⌘ ⇧ 4? In Preview, File → New from Clipboard (⌘ N) opens it without saving a file first.
Preview saves your changes as you go. If you change your mind, File → Revert To brings back an earlier version.
Best for: resizing, converting and fixing screenshots you already saved.
3. Hide or change text in a screenshot
Markup has no blur tool, so the way to hide text on a Mac is to cover it. Draw a rectangle over the email, name or API key, then set its fill colour to solid black.
Pick this if you're sharing a screenshot with private details in it.
Make sure the box fully covers the text. A semi-transparent shape can still be read.
To change words in a screenshot, cover them the same way with a fill that matches the background. Then add a text box on top with the new words.
Markup can't edit the original text, because a screenshot is just pixels.
Best for: redacting a screenshot before you post it.
4. Make a screenshot look polished with Pika
Pika is a free screenshot editor that runs in Safari, Chrome or any other browser. It adds what Markup can't: backgrounds, padding, rounded corners, shadows, browser frames and sizes made for each social site.
Pick this if the screenshot is going into a tweet, a launch post, a deck or your docs.
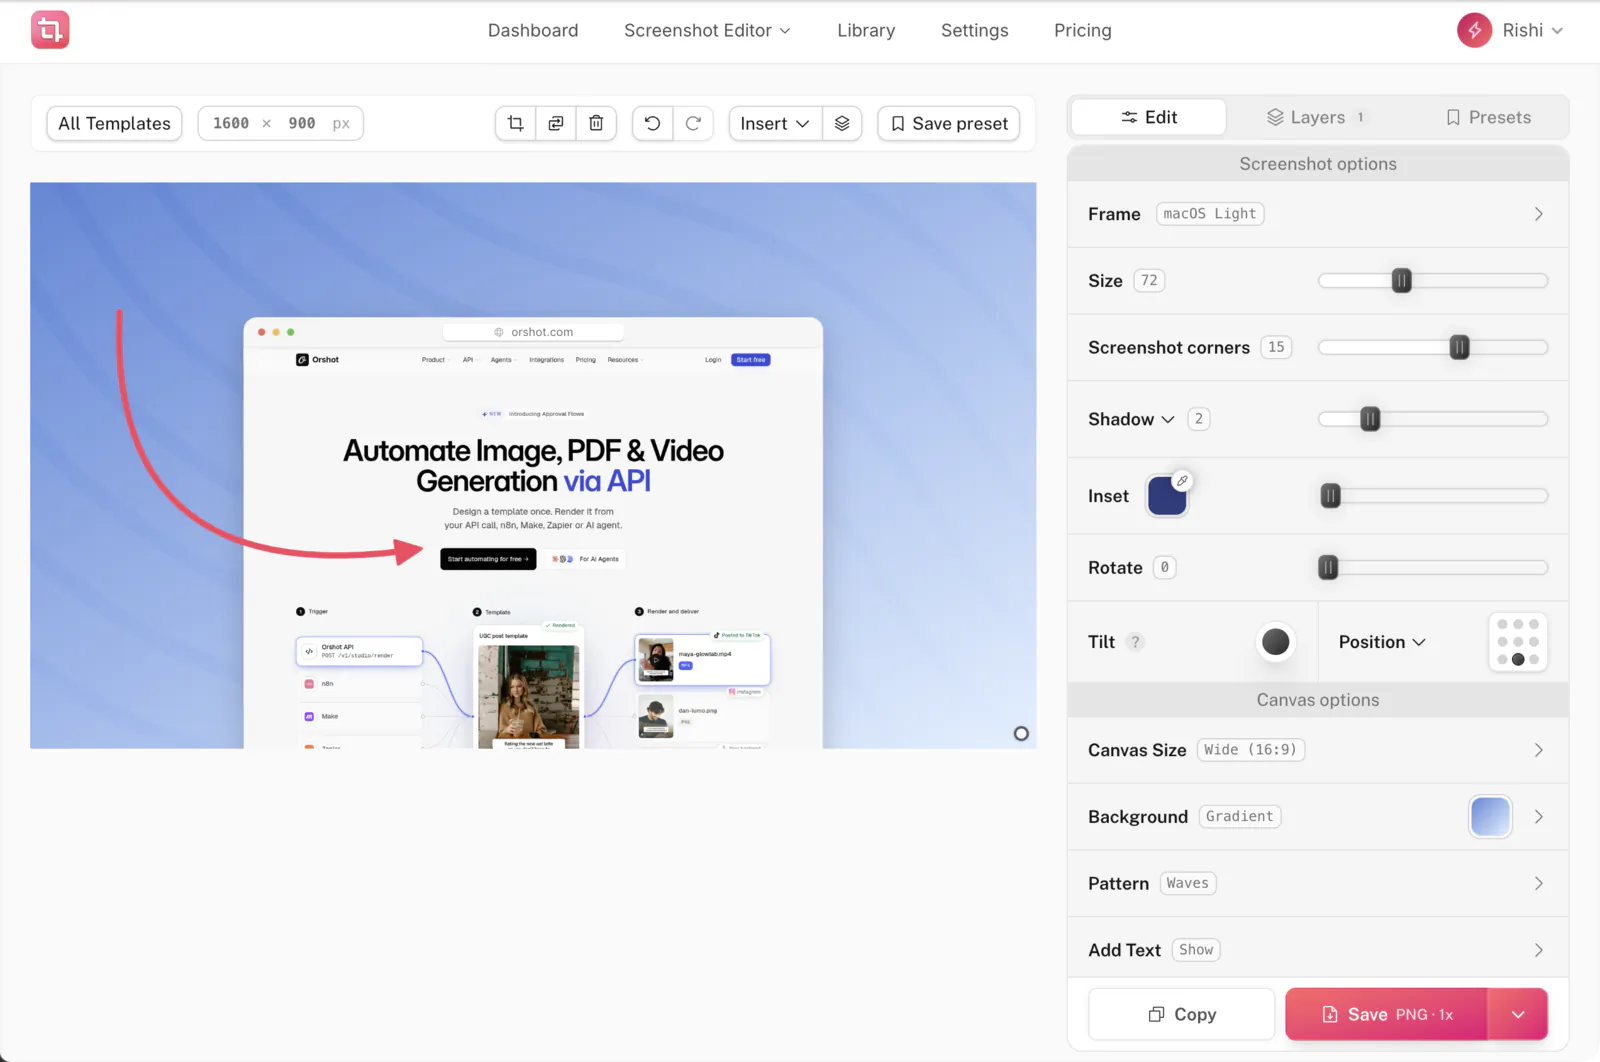
Disclosure: I built Pika. There's nothing to install and you don't need an account. The canvas is on the left and every option is in the sidebar on the right.
Step 1: Paste your screenshot
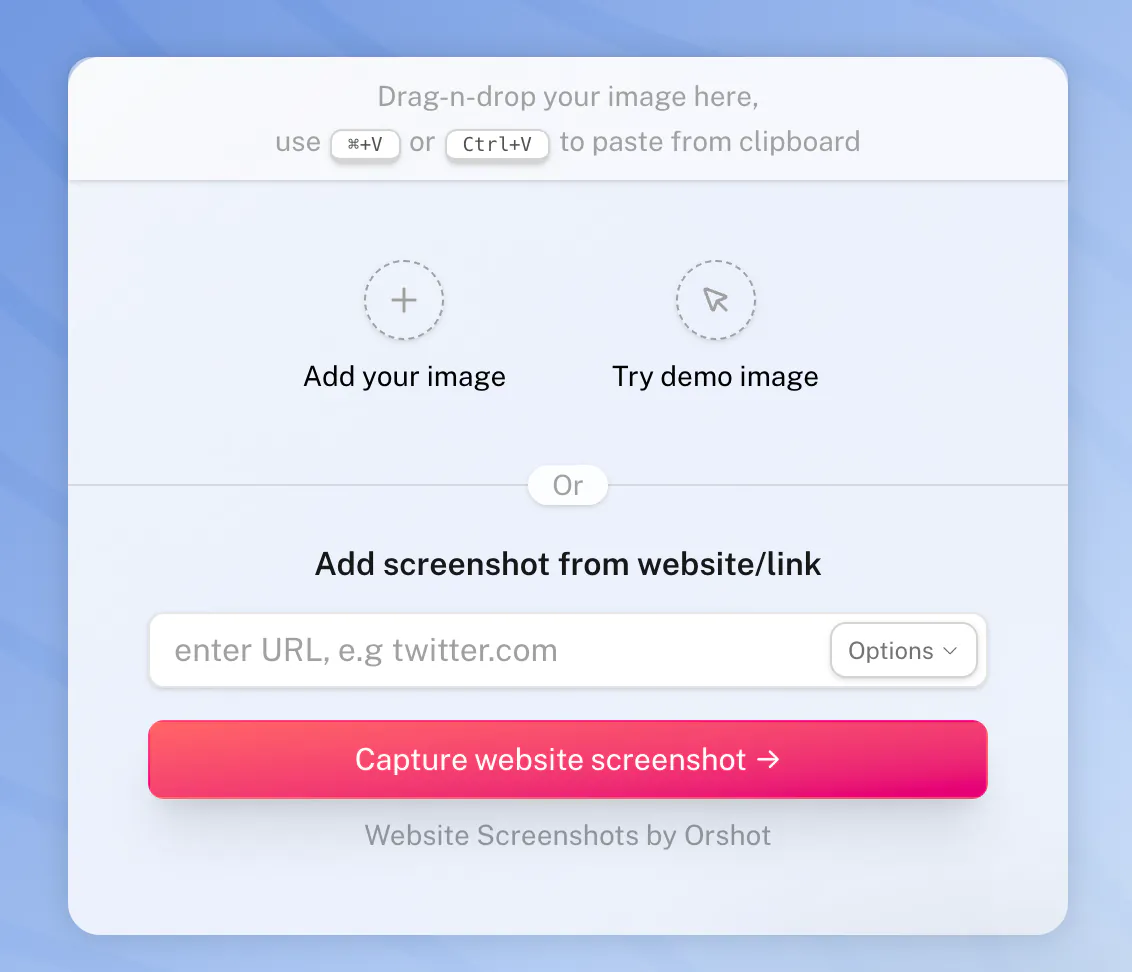
Press ⌃ ⌘ ⇧ 4 to copy an area, switch to the editor and press ⌘ V. You can also drag in a file from your Desktop.
Pika can also capture a page for you. Type a website's address and it takes the screenshot.
Step 2: Pick a background
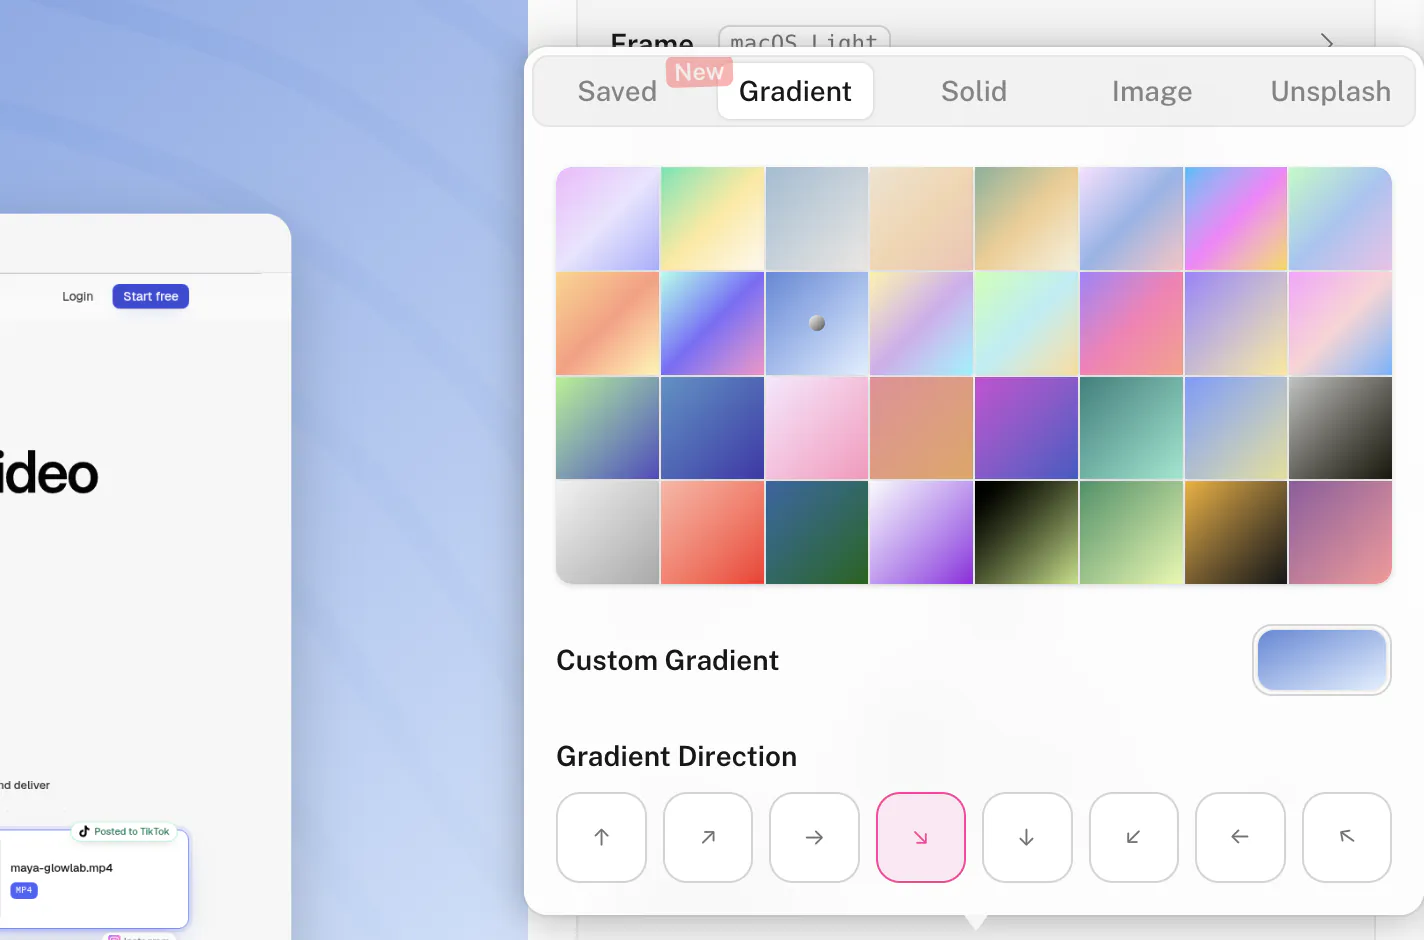
Click Background and choose a gradient, a solid colour, an image or a photo from Unsplash. You can also make your own gradient, set its direction and add a subtle pattern on top.
Step 3: Add a window frame
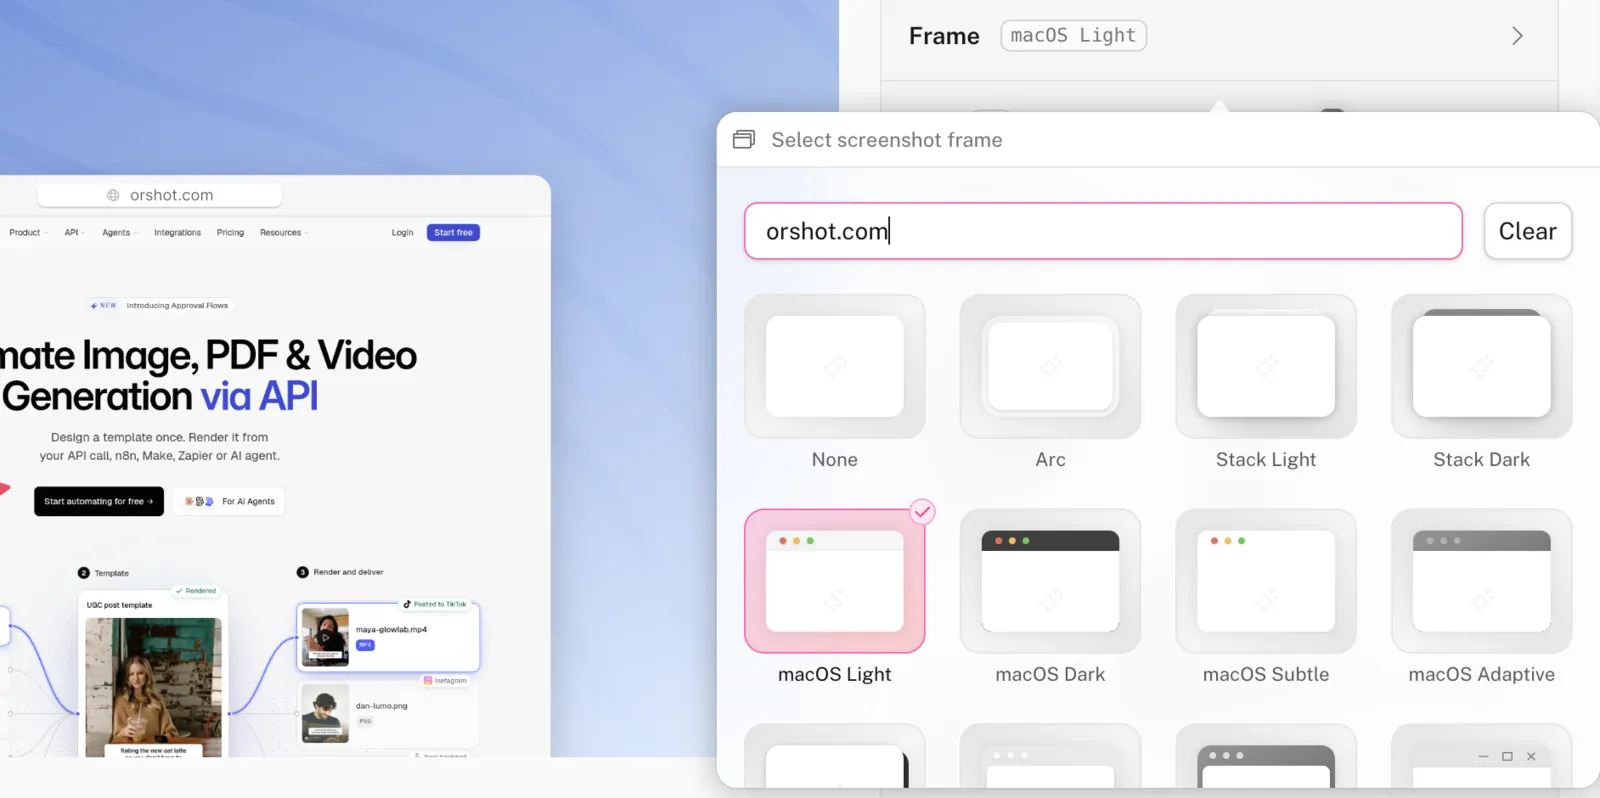
A window frame makes a screenshot read as an app at a glance. Pick macOS Light, macOS Dark, Arc, Windows or another frame, and type your own address into the URL bar.
Then drag the Size, Screenshot corners and Shadow sliders until the spacing looks right. The Position grid pins the screenshot to an edge, like the bottom-centre look in the example at the top.
Step 4: Point things out
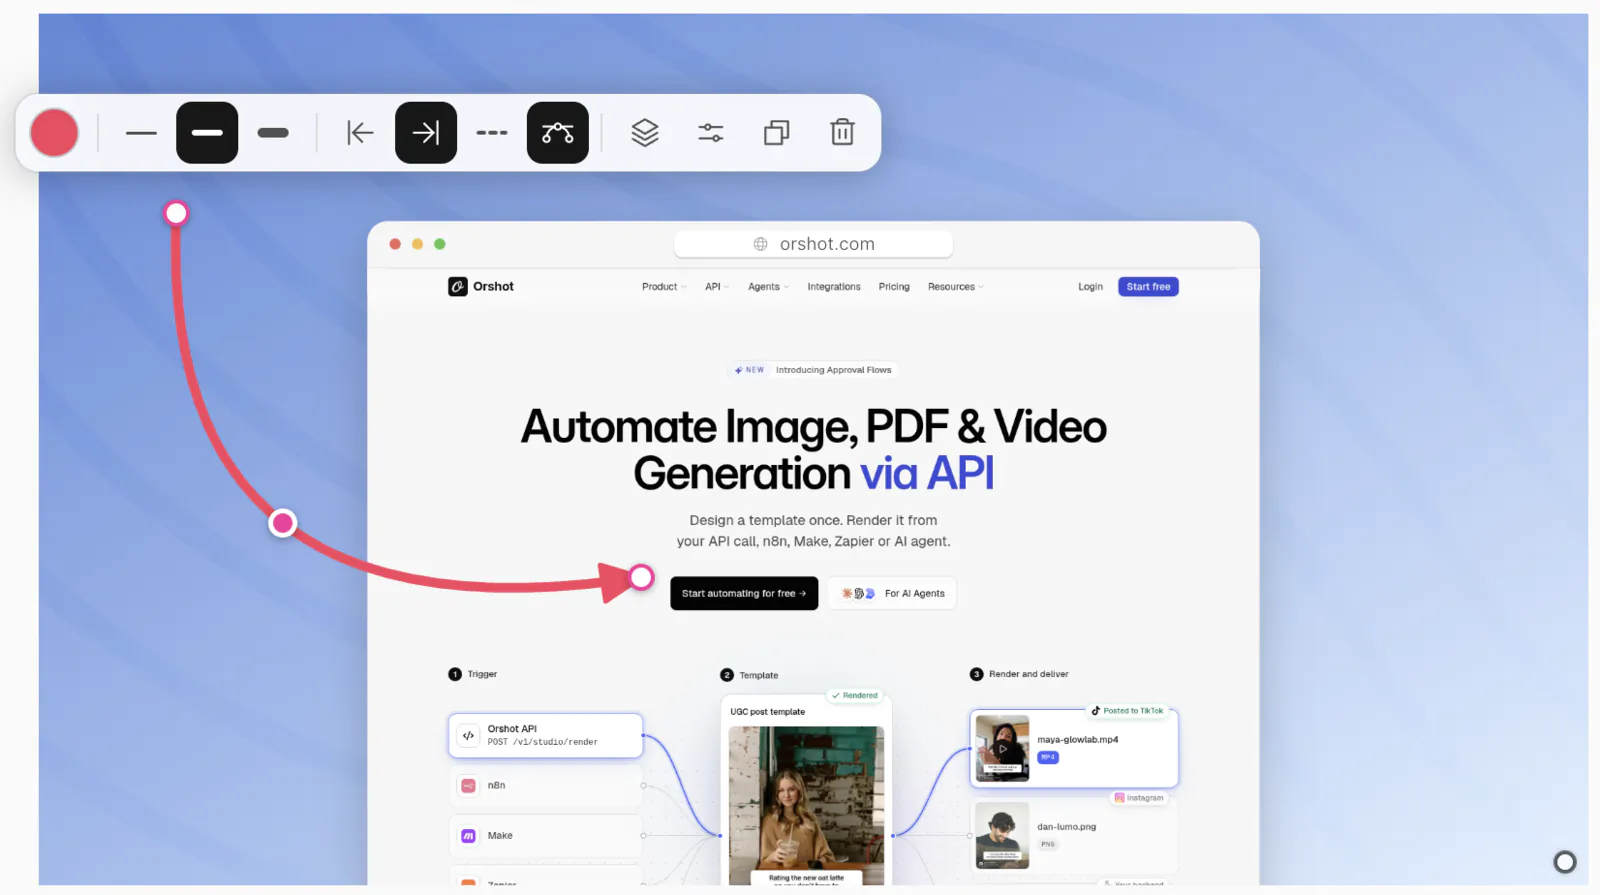
Press A and drag to draw an arrow, then pull its middle handle to bend it into a curved arrow. Rectangles, circles, highlights and a cursor work the same way.
Each annotation gets its own layer. Arrows, shapes and highlights are free, and text labels are part of Pro.
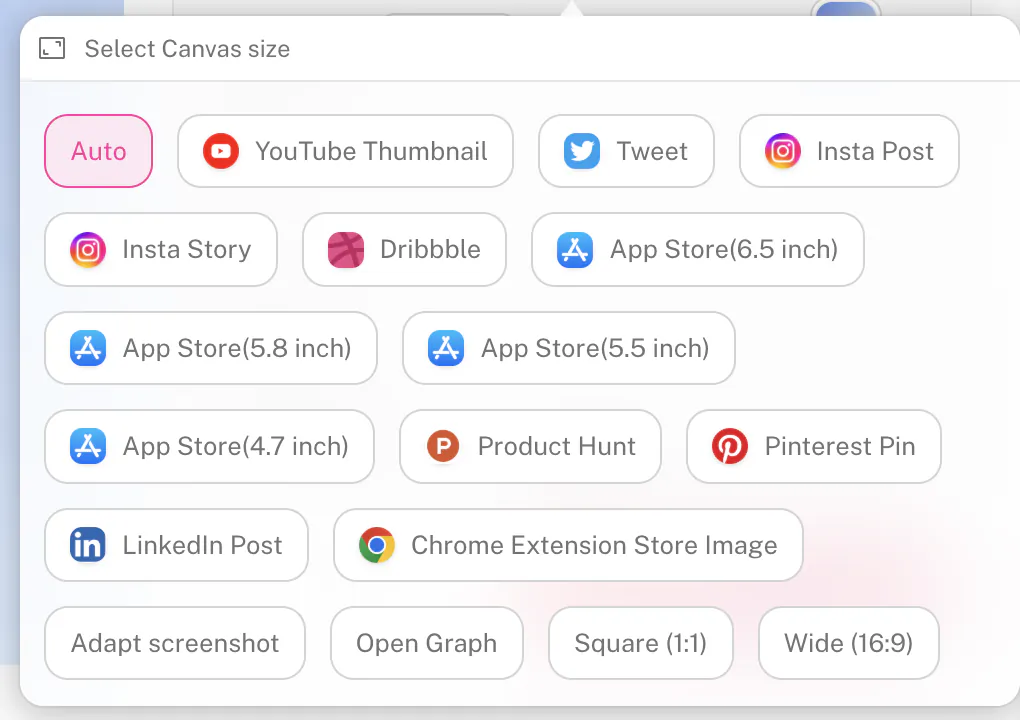
Step 5: Size it for where it's going
Canvas Size has presets for YouTube thumbnails, X, Instagram, LinkedIn, Dribbble, Product Hunt, Pinterest and the App Store. Pick one and the export comes out at that site's exact size.
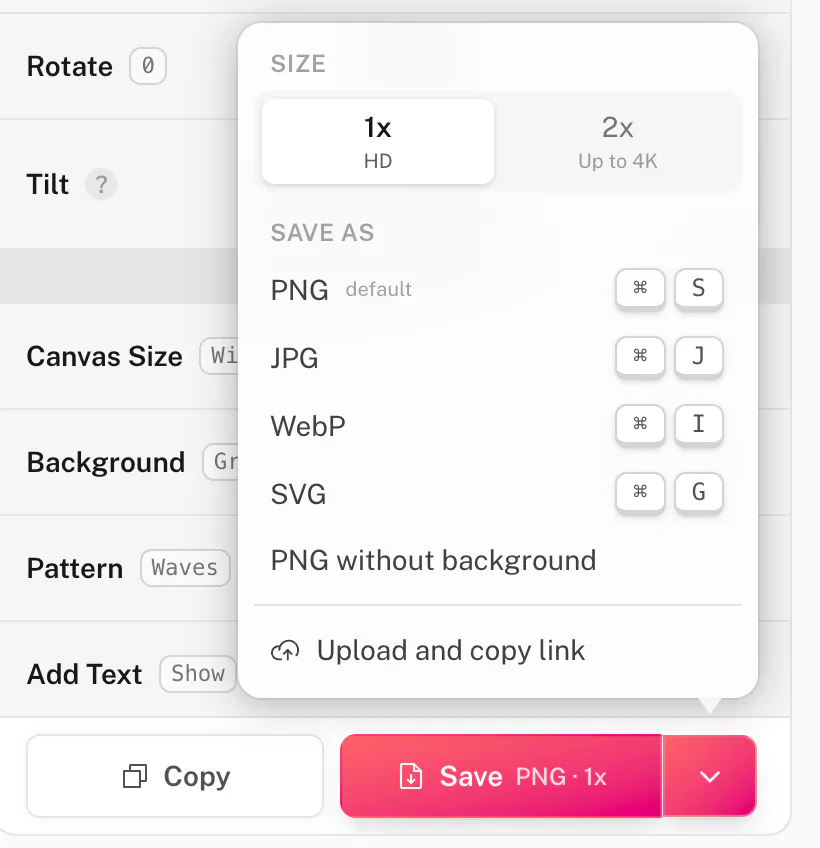
Step 6: Save or copy
Click Copy to paste the image straight into Slack, X or a doc, or Save for a PNG. The arrow next to Save also has JPG and a PNG without the background.
What's good and what isn't
- Good: free, nothing to install, and backgrounds, frames, arrows and PNG or JPG export all work without an account.
- Good: canvas presets mean you never look up social image sizes again.
- Not so good: free exports include a small "designed in Pika.style" watermark.
- Not so good: text labels, 2x and 4K export, WebP, SVG and share links need Pika Pro.
- Not so good: Pika has no blur tool either, so redact in Markup first.
Best for: making a screenshot look designed in about a minute, sized for wherever it's going.
Skip the copy and paste
Pika has three shortcuts that send a screenshot straight to the editor. They're worth it if you edit screenshots every day.
- Pika for Mac. A menu bar app: select part of your screen and it opens in Pika's editor. macOS asks for screen recording permission the first time.
- Raycast extension. Opens an image file, a website or an image URL in Pika from Raycast.
- Chrome extension. Captures the tab you're on in one click. It also works in Edge, Brave and Arc.
Common questions
Where do screenshots go on a Mac?
Screenshots go to your Desktop by default, named "Screenshot" followed by the date and time. To save them somewhere else, press ⌘ ⇧ 5, click Options and pick a folder under "Save to". The new folder is used for every screenshot after that.
How do I crop a screenshot on Mac without extra software?
Click the thumbnail after taking the screenshot, click the crop button in Markup and drag the corners. For a saved screenshot, open it in Preview, drag over the part you want and press ⌘ K. Both tools come with every Mac.
How do I add text to a screenshot on Mac?
Open the screenshot in Markup or Preview and click the Text button, the one with a T. A text box appears that you can drag, resize and restyle from the font menu. Click Done in Markup, or just close Preview, to keep the text.
How do I blur part of a screenshot on Mac?
macOS can't blur part of a screenshot, since Markup and Preview have no blur tool. Draw a rectangle over the private part instead and set its fill to a solid colour. A solid box is safer than a blur, which can sometimes be reversed.
Can I edit the text in a screenshot on Mac?
No. A screenshot is an image, so Markup can't change the words in it. Cover the old text with a rectangle filled in the background colour, then add a text box with the new words on top. Matching the font closely takes a few tries.
Can I undo changes to a screenshot I already saved?
Yes. Open the screenshot in Preview and choose File → Revert To, then pick an earlier version from the list. Preview keeps versions automatically, so this works even after you closed the file.
Is there a free screenshot editor for Mac?
Yes. Markup and Preview are built into every Mac and cover cropping, arrows and text. For backgrounds, frames and mockups, Pika's screenshot editor is free in any browser. Our list of free screenshot editors has a few more options.
What is Pika?
Pika is a free online screenshot editor that turns screenshots into polished images with backgrounds, browser frames, shadows and annotations. Pika runs in the browser, with a Mac menu bar app and Chrome and Raycast extensions. Pika Pro removes the watermark and adds 4K export and saved presets.